
Microsoft Entra ID
This guide describes how to configure Microsoft Entra ID (formerly Azure AD) as an identity provider for access control to the OpenDocBot addin. The guide assumes a self-hosted OpenDocBot instance. For the general setup, see Single Sign-On.
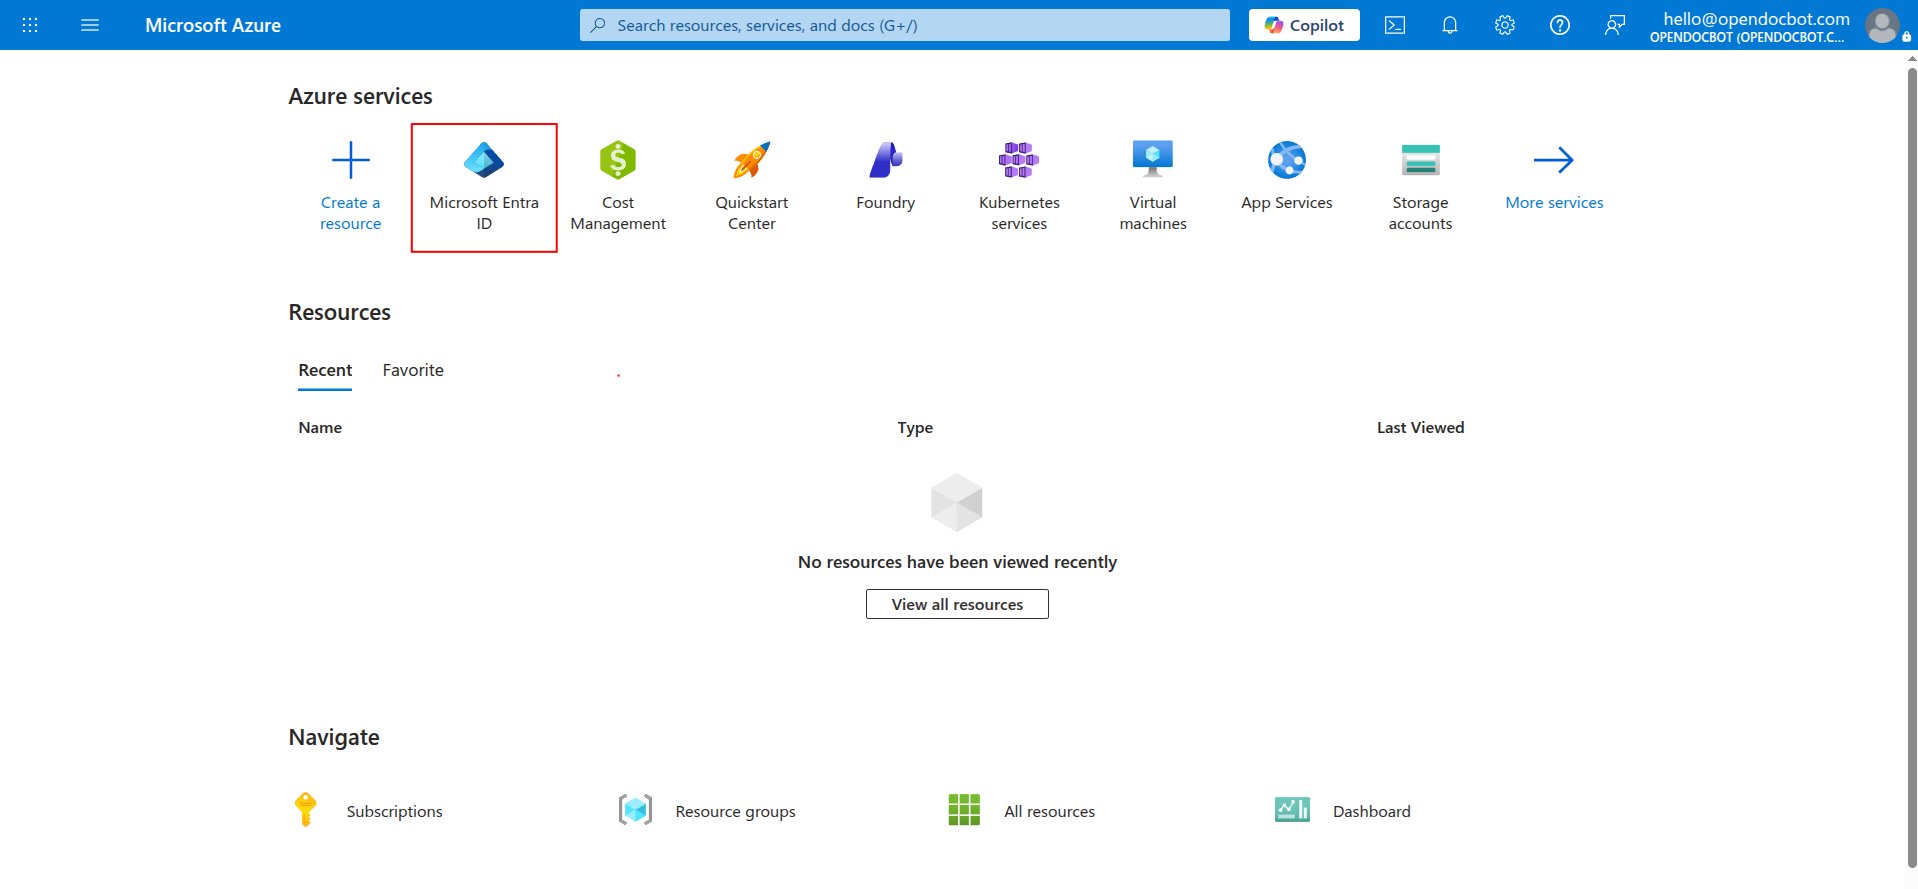
1. Access the Entra admin center
- Access the Azure Portal with an admin account
- Search for the Entra ID service
2. Register the application
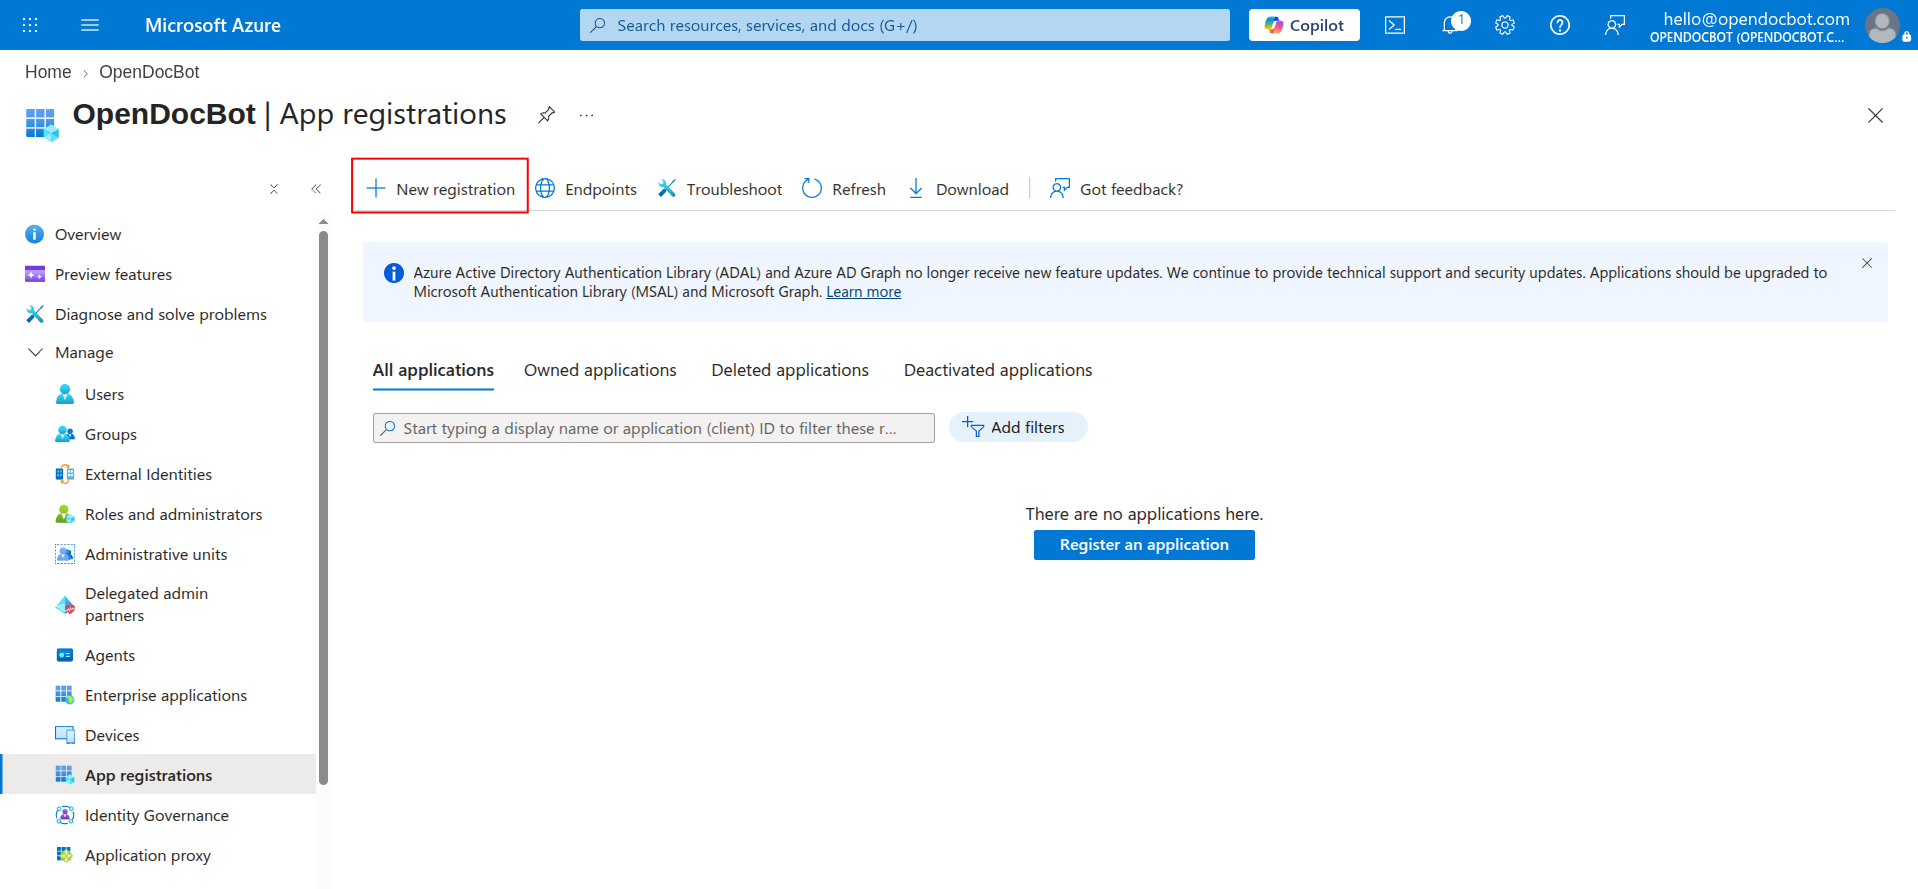
- In the Entra admin center, go to Manage > App registrations and choose New registration.
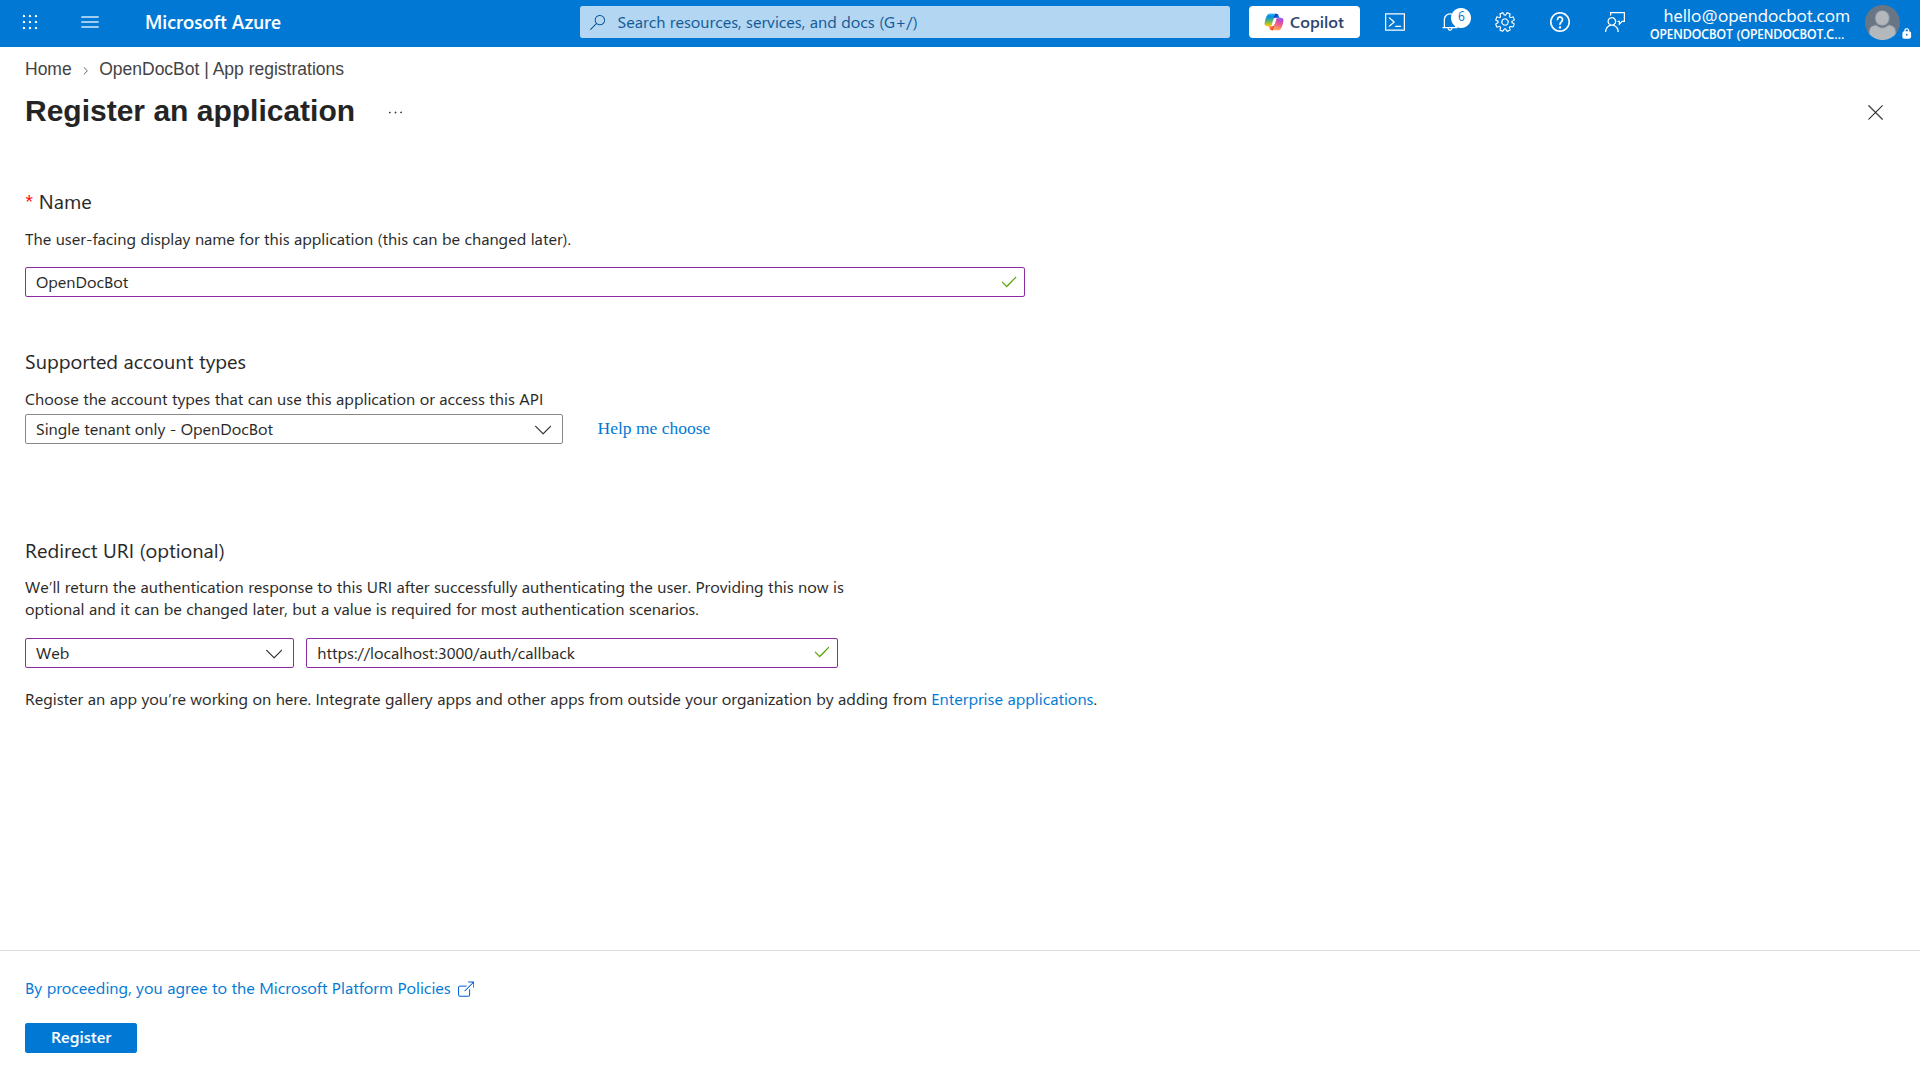
- Give it a name, for example
OpenDocBot. - Under Supported account types, pick the option that matches your organization. Most deployments use Single tenant only.
- In the redirect URI, select the platform
Weband set the redirect URI tohttps://<your-host>/auth/callback, replacing<your-host>with the public address of your OpenDocBot instance.
3. Create a client secret
- In the newly created app registration, go to ** Manage > Certificates & secrets** and choose New client secret.
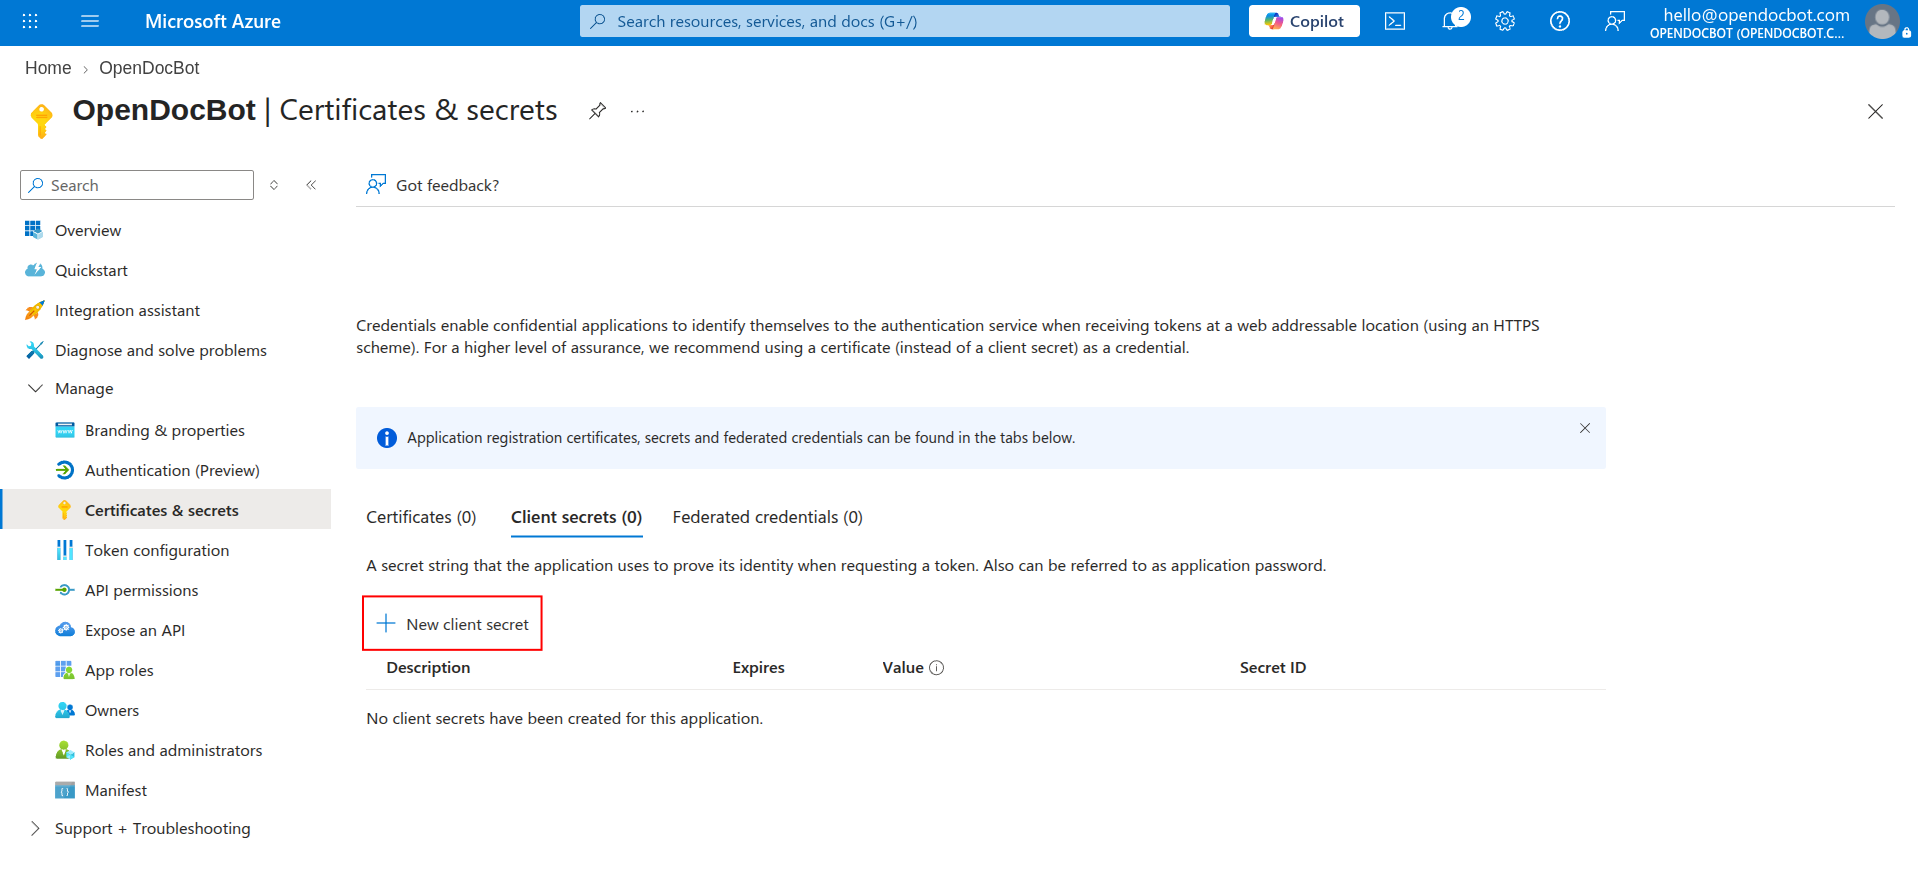
- Set an expiry and create it.
- Copy the secret value right away. The secret ID is not enough, and the value is only shown once.
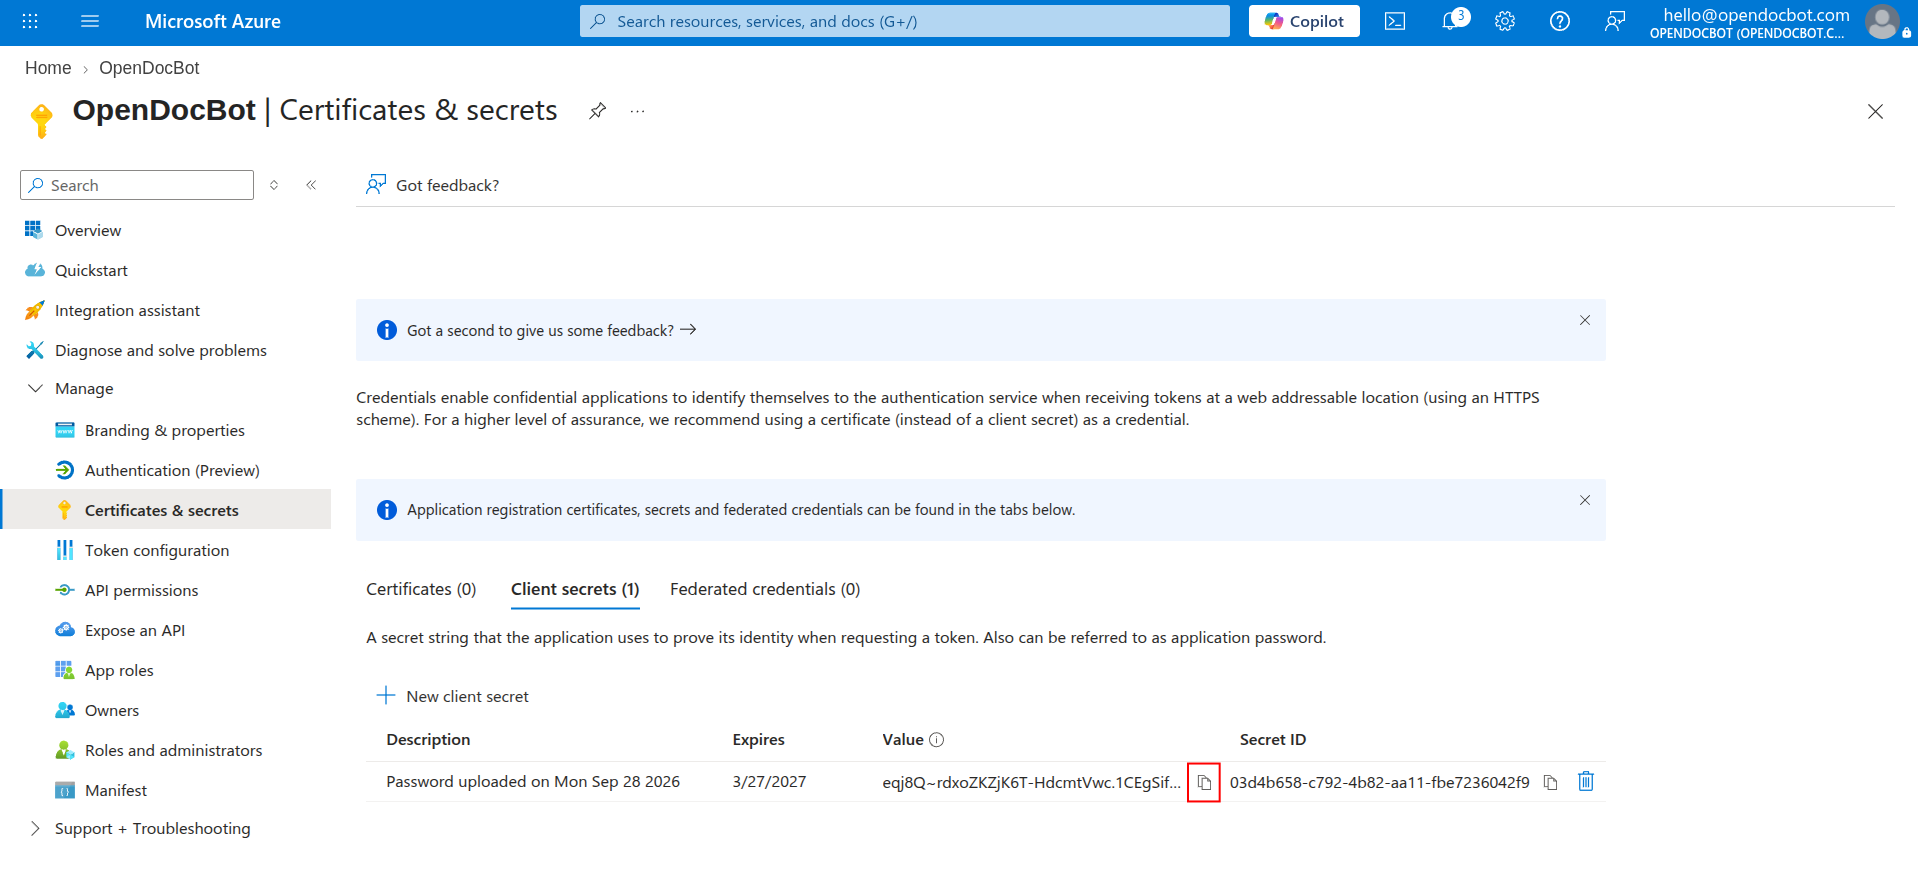
4. Configure OpenDocBot
Navigate to your app registration overview, and find the following values:
- Application (client) ID
- Directory (tenant) ID
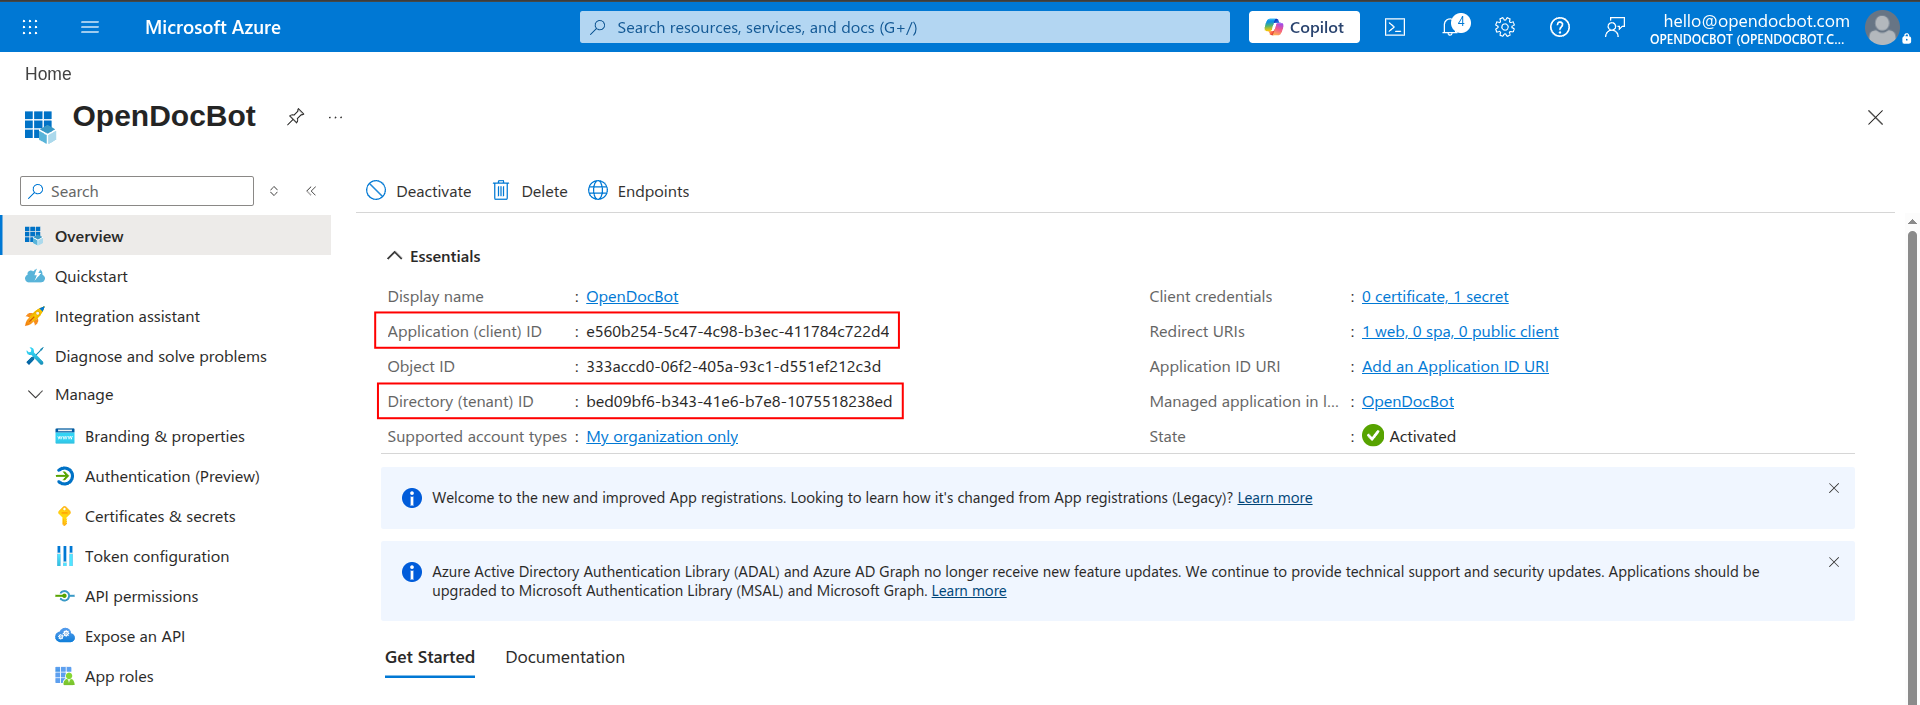
Set these in the server's .env and restart:
dotenv
OPENDOCBOT_OIDC_ISSUER=https://login.microsoftonline.com/<tenant-id>/v2.0
OPENDOCBOT_OIDC_CLIENT_ID=<client-id>
OPENDOCBOT_OIDC_CLIENT_SECRET=<client-secret-value>After the server restart, the OpenDocBot addin will request users to login with their enterprise account.
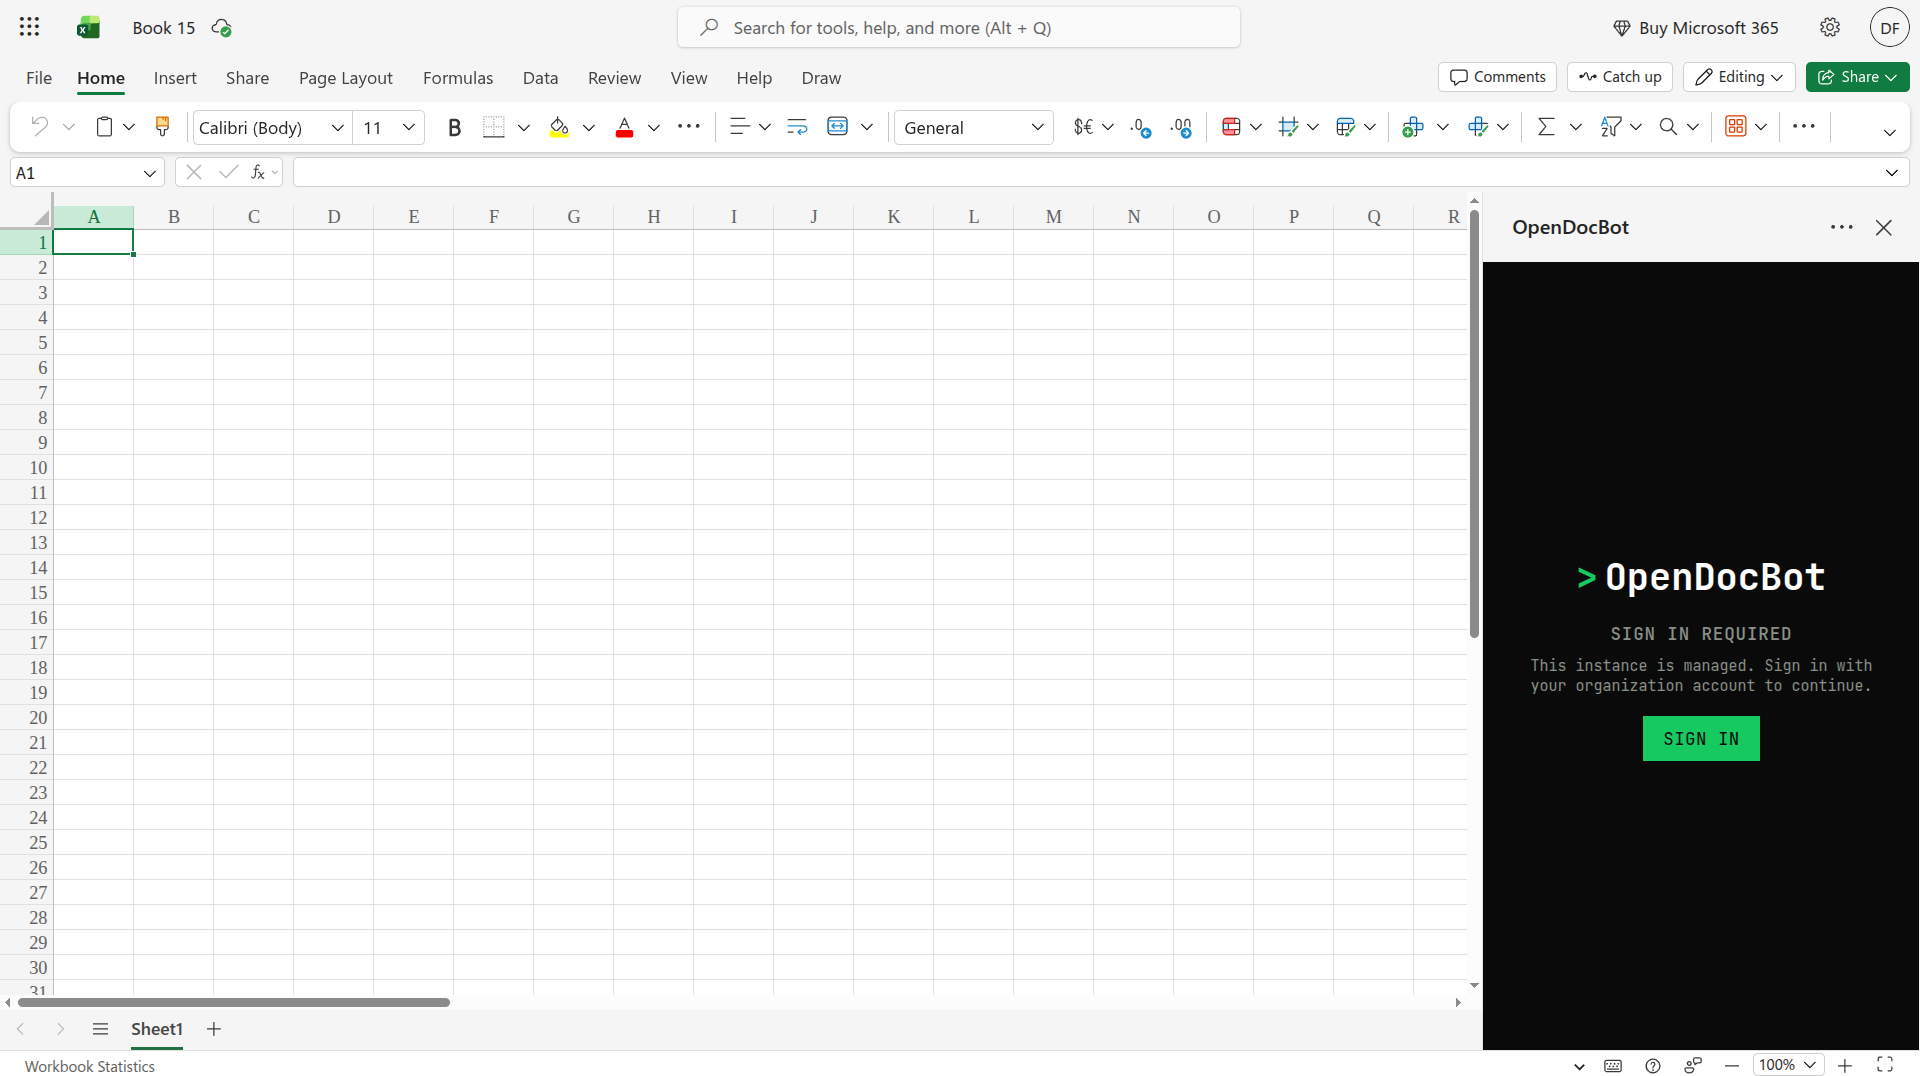
Only users with a sucessful login will be able to use the addin.
5. (Optional) Manage access via Entra ID groups
This step is only needed if you want to restrict access by Entra ID group.
- In your Entra app registration, navigate to Manage > Token configuration and choose Add groups claim.
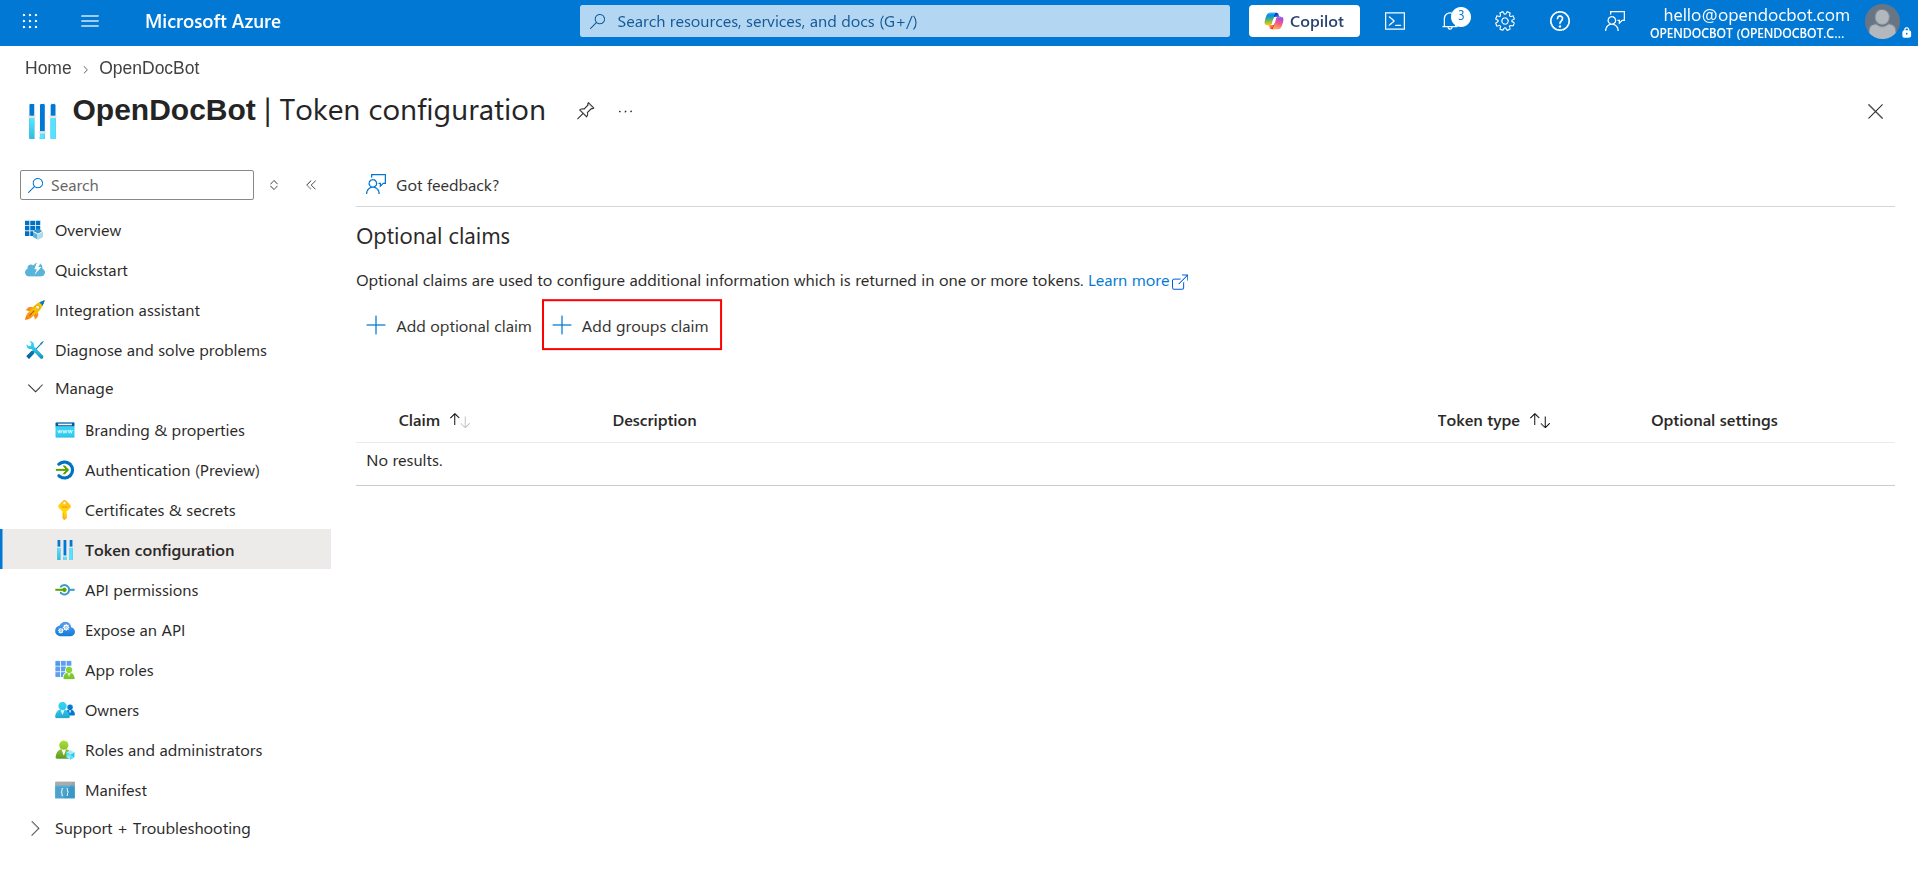
- Select which groups and reported and in which format, Then click Add. In this example, we will be reporting all groups by ID.
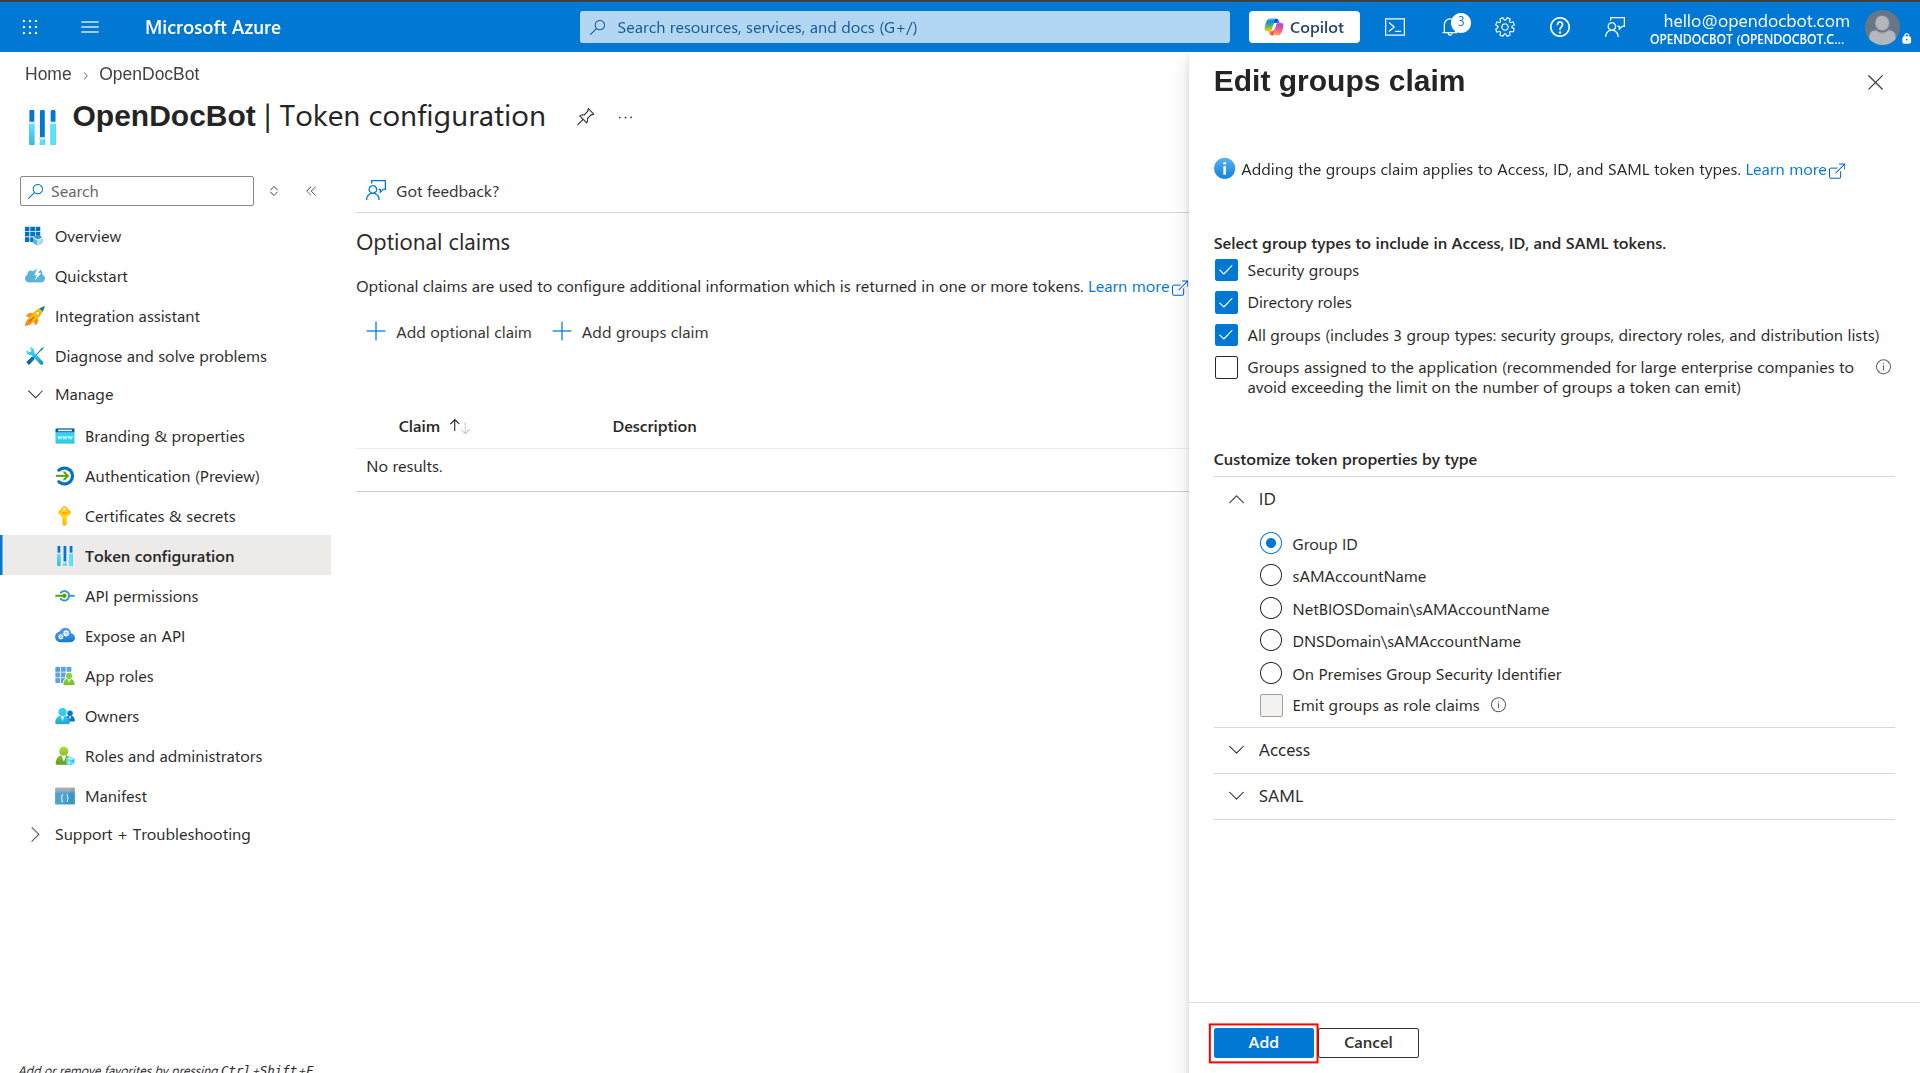
Since we are reporting groups by ID, add a list of allowed group IDs to OPENDOCBOT_OIDC_ALLOWED_GROUPS in you server .env. With this configuration, the identity provider (Entra) will be reporting to your OpenDocBot server the group membership of every loged user. OpenDocBot will restrict the access only to the users in at least one of the groups configured in OPENDOCBOT_OIDC_ALLOWED_GROUPS.
Good to know
- The issuer must point at the v2 endpoint and end in
/v2.0. If sign-in fails withinvalid id_token issuer, check this value first. - If a user belongs to many groups, Entra sends a group overage instead of the list, and the sign-in is refused. Enable assignment on the enterprise application and assign only the groups you need.
- If your OpenDocBot server is behind a reverse proxy, set
OPENDOCBOT_OIDC_REDIRECT_URIexplicitly. See Single Sign-On.